Sunday, September 8, 2013

A few Old Pages with Places to Hide Stuff!

Wow! This sure takes me back quite a few years......

Here's one of the pages that I mentioned on Scrapbooker's Paradise Blog this week.  I just had a sneak peek of the pocket folder so I thought that I would add a few more pictures here.  I did this layout many years ago when I had noticed that I had pictures of both Daryl and I at about the same ages when we were back in grade school.


I like using big pictures on my pages both for impact and because I know that I will need bigger pictures when I'm older and I want to reminisce.  I just picked a couple of my favorites for the main part of the page and then I created a booklet with the rest of the images......


........And of course with all of the journaling.  This is after all the part that I think is most important if I'm going to keep forgetting at the rate that I am now.


This one is my FAVORITE layout of all time.  I know it's old now but I remember all of thought process that went into creating it.  The whole thing is about my daughter Jennifer's Synchro years as a Duet Partner.  Duets were really one of her strengths and she swam a duet every one of her 14 years as a Synchro Swimmer both in Canada and the US.  The paper that the picture is printed on is actually a Scrapbook paper that just had words and definitions.  The words are all about friendship and strength so I thought they would make a perfect background for this picture of her and her partner in one of her final years as a swimmer.  I purposely printed it upside down because that's what synchro is all about and I wanted the focus to be on the picture and not the words.


I wanted to make sure that we never forget all of this stuff so I made sure that all of the names of every partner and year they swam was recorded.


On the inside I added some action shots of her swimming one of her most successful routines as well as the name of the routine.


And then the picture on the back cover features the routine that is also featured on the main page layout. There were so many things that I didn't remember until I pulled this out and that me realize once again why this is so important.


This next layout is the oldest of all of all but it covers a really important part of scrapping.....and that is dealing with what may be somewhat touchy or embarrassing pictures.


These pictures are of my son who is the youngest of three.  His older sisters loved to dress him up as a girl and make him pose in what were funny poses then but kind of not so funny for him now.  These are things that I don't want to forget so I decided to deal with these pictures more tactfully.  I used an old game show theme for the layout and I described the game and I how it related to this experience in the journaling.


I thought that it would be fun to just give a bit of a peak preview of what is behind each door by cutting holes in strategic areas and adding mesh to those areas.  Here is one of the pictures behind a door.  That's my boy with make-up and a wig and he was such a young lad to be subjected to this....but it was funny then and it will be on his wedding day (someday -maybe)!


Here's a better picture of the windows and screen.  You can clearly see only a portion that would make you want to find out what is behind the door.


Here are just a few more ideas of pockets for journaling that I think are effective and really easy to do.  This first one has a rather large square opening in the front of the pocket envelope but it reveals enough of the journaling to at least let the important points be seen quickly for the person who just wants to have a quick look at the album.


Here's one where the pocket is part of the page's theme.  Drawing stitch lines can turn any paper into a pair of pants with belt loops.


This page is a few years old.  The paper is from 'Rusty Pickle' and they closed their doors back in February of 2010.


I hope you enjoyed the trip down memory lane.  Have a great week.

Sunday, September 1, 2013

This week in Paradise!

There are so many NEW things arriving daily at the warehouse that I have a hard time trying to decide what to use next.

This week's technique however uses some product that I've had for a couple of months and have been dying to try something new with.  Here is the card that I made for Scrapbooker's this week and the full tutorial is on Scrapbooker's Paradise Blog.


Here is the bonus and the basic instructions for it:


For this card, I used the cut-out portion as my mask and inked it first.


Using my same mask I then stamped with my 'Script' stamp


I kept some of the leaves without text and then using my mask I daubed versamark ink onto each of the leaves and heat embossed using clear Utee.


I proceeded to create my background using a combination of Dylusions sprays and Distress Inks.


I just play around until I get the look that I want.  My paper was so saturated on the front and the back that my outer edges started to smear from underneath but I like the look so I left it.


And,......finally this is the background mat comparisons that I mentioned.  I didn't do these in Photoshop. I took a picture of Koen's picture on several backgrounds so that you can see the difference for yourself. We all have different taste but some of the differences are pretty obvious.  Keep in mind that I used the same picture on each of the different colored mats so you can see how the skin tends to take on the color of it's surrounding.  I think the clear winner is the 'middle gray' in the center.  Let me know what your favorites are.


Hope the rest of your long weekend is great,


Sunday, August 25, 2013

He did it!!!

All the Scrapbooking and computer work paid off......my boy GRADUATED!


He still steals everything in sight and I swear he thinks that's funny....Taking things is a sport for him since he's never destroyed anything (yet) except for paper, but he can sure run fast when he knows that he has something he shouldn't.

This week I did a couple of cards for Scrapbooker's Paradise and although I'm not really a cardmaker, I did enjoy making these.  I think that making cards should be a natural extension for all Scrapbookers.  You get to use the leftover bits and you`re putting all those tools to good use.


Both cards use almost all of the identical products and yet they really do look quite different.  There are only a couple of products that are different and that's it.  I got the 'Winter Neighborhood Border' with Christmas cards in mind but I think that it would be great for "Congratulations on your New Home"or "Welcome Home" cards.  The little houses are adorable cut apart and they`re all different.  What you can`t see is how much embossing detail there is on each one of those.  The big Snowflake on the 'purple' card is mounted on an action wobble and it works great for this.  I still really love those things and they always make such an impact.

If you have any ideas for something that you would like to see or a tutorial on how to use a product or tool that you already have, just leave me a message and I`ll see what I can do.


Sunday, August 18, 2013

Just some Updates......

Planning this weeks` Blog-post for Scrapbooker`s Paradise has made me think a lot about all of the pictures that I wish I`d taken.  I can`t imagine losing all of my pictures especially now that I`m older and my memory is not as good as it was.  I've reached that age where I can remember the things that I did years ago well...but I can`t remember why I even walked into a room and what I`m looking for.  At least I`m not this bad......


There are some great websites that will host your high resolution images at a fairly minimal cost.  For Scrapbooker`s a great option is Heritage Makers since you not only get to store images but you have access to so many elements for Photobooks and they are one of the best ways to create multiples.


I also use SmugMug and I've been using it for almost 8 years now.  This is a site that is really just dedicated to hosting images. They've made a lot of recent changes and I`m working on upgrading my site.  I`ve got the tab linked above.

I took the pictures for some good friends wedding a couple of years ago and their home was devastated by the flooding in Calgary and along with that all of their wedding pictures.  I`m so glad that I uploaded those photos so that I can get these back for them.

Check out all of the School Checklists on the August 18th post that I added of all of the things that I wish I`d done when my kids were in school.

On a lighter note, here`s an update on Mack`s training.........


He`s using the laptop now..........


Sunday, August 11, 2013

Embed the Title for a subtle Look....

I was preparing something for the work blog this week and I suddenly got an idea and had to try it out.  I decided to try making my title stand out on my page but in a very subtle way so that it wouldn't take the eye off the pictures.

Here is the actual page that I did for 'Scrapbooker's Paradise'.  For the Blog, I did the background paper. This started as a plain white sheet of cardstock..


If you look closely, you will see the word 'mexico in the center row of pictures.  All of the pictures on this page have been raised somehow but the pictures are still intact overall.


Here is a close-up of some of the letters that were cut with very well used 'Word Play' alphabet die from Sizzix.

 
I started by printing my pictures twice and then I cut my letters from my selected photos.  I also cut each of my letters out of black fun foam.  For each letter, I glued a matching letter of foam to the back of my picture letters and then I carefully adhered each of the letters on to the matching images and made sure that they lined up perfectly.


For each of the other pictures, I just hand cut the portion that I wanted to stand out and carefully popped these up making sure that they lined up perfectly with the matching picture below.


I have used this 'Word Play' die so much and I still keep finding new ways to use it.  What's not to love!

I've had Mack in training for the last month and he seems to be coming along nicely,  Here's a picture of the little guy hard at work


Until next week,

Sunday, July 28, 2013

More Fun with Art Anthology!

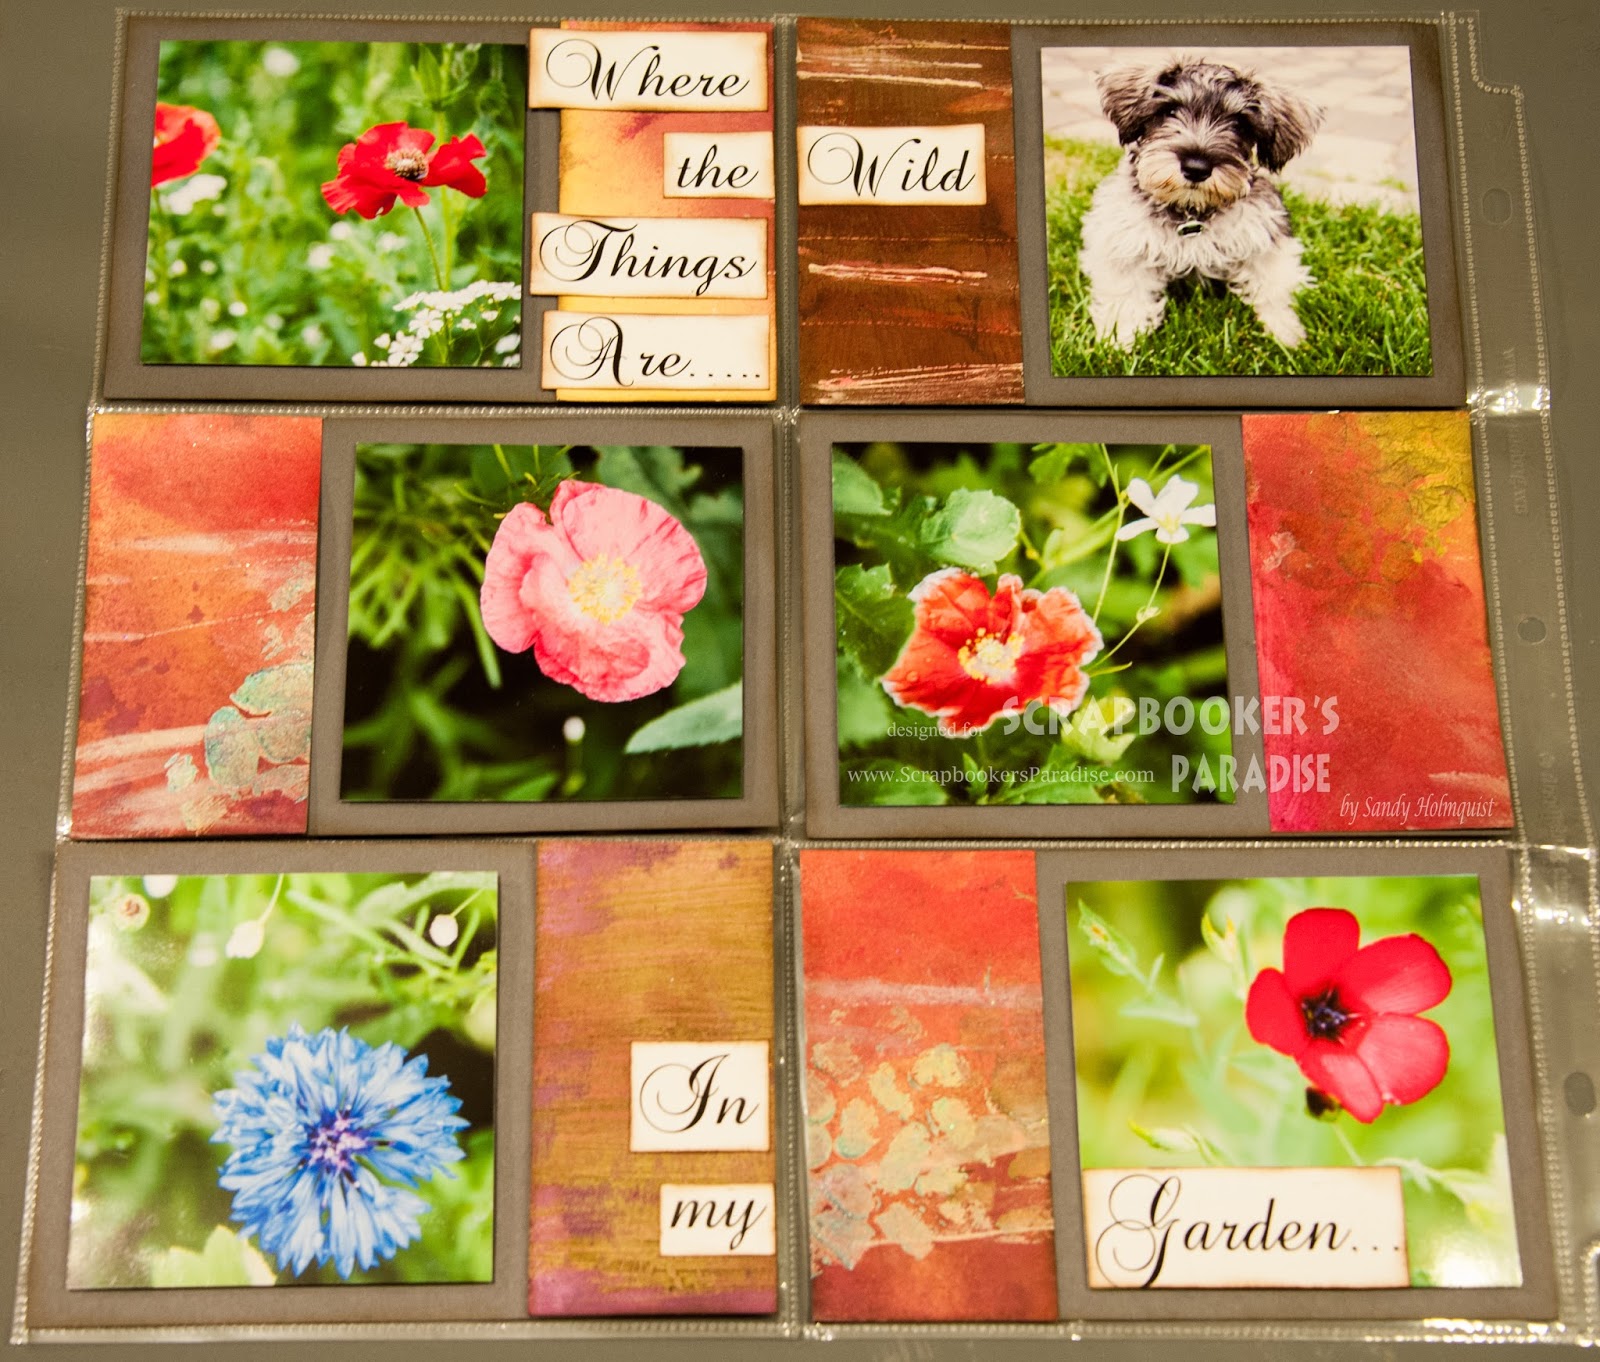
I just finished my post for Scrapbooker`s Paradise and I just had to quickly do a few more samples to show another fun technique with the Art Anthology product.  I did this on my `Garden Page` but the detail didn`t show in the picture.  The top right pocket actually has a wood grain effect showing on the paper under the word `Wild`.


I still have to add my journalling to this page.  I`m just going to add a pull-out tag that will fit in behind on one of these pockets.  I have to tell the real story because I don`t grow `Wild`puppies in my garden.
(My husband told me that the rabbits were eating the heads off the flowers and I discovered while I was out with the puppy taking pictures that he was the wild one taking the heads off the flowers.  It was really quite funny watching him.)

Here`s the technique that I want to share for you:

I just used some Art Anthology Velvet Paint and brushed it on my page.

 I then used a stamp and stamped immediately into the wet paint. 

 This is when I discovered that I hadn`t really cleaned my stamp last time I used it but I love how that turned out. Because of the dimension that the paint creates, the stamped portion looks debossed.

 Here is the effect that I was really after.  When I stamp quickly (with a clean stamp) into the wet `Velvet` paint, It actually removes the paint from my page.  This turned out quite well as you can see.

 Here is another experiment that I tried.  I`ve done this many times before but I wanted to try it with this product. I used my `Velvet`and just brushed onto my stamp directly and then stamped it on to my page.

Here is the effect that I get then.  I also spritz my stamp with water right after this and it also worked well.  The effect was lighter in color since I never added any more paint to the stamp.

I hope you enjoyed this little tutorial.
Later,

Sunday, July 21, 2013

Long Overdue!!!!!

I started Scrapbooking after my children were born so I just never got around to doing anything with my wedding pictures and for years they`ve been sitting in one of those old magnetic albums.  I know how bad these albums are for my pictures and for the last few years, I`ve slowly been working at prying each one out.  The Undu has been working well for this and I finally have most of the pictures pried loose.  

Here`s the old album:


And here`s what I`ve done so far.....in less than half an hour!


I don`t have any of the journalling done yet but you can see how easy that`s going to be.  I can`t believe that I`m saying this but I can`t wait to get up tomorrow and get more done.  

I bought the Becky Higgins `Project Life`Cinnamon Collection for myself and I thought that it would take me at least a month or so to really get into this but I was hooked in less than an hour.  This is so fast because you really don`t need anything except your pictures and your kit.  No scissors, no glue.  We have four of these kits available at Scrapbooker`s Paradise as well as the `Baby for Her and Him`and the `Wedding` kit.

Neither of my daughters Scrap but they`re each going to get a kit as a gift and I`m pretty sure that this is something that they`ll both be able to keep up with and actually enjoy.  

And here`s my Mack update.........


These two actually have fun playing together!  Koen is so used to playing with a much bigger dog that nothing Mack can do to him will hurt.


Koen definitely has the most energy of the two.


Isn`t he adorable!
And below is the rare shot of me with my baby that Katie insisted on taking!


Thanks for stopping in and have a great week!